Read Our Latest Blogs
Simple DIYs, how to prepare your environment, product features, and so much more!

DIY 3-Part Cards
*Disclosure: This post may contain affiliate links.
The cards with 3 parts
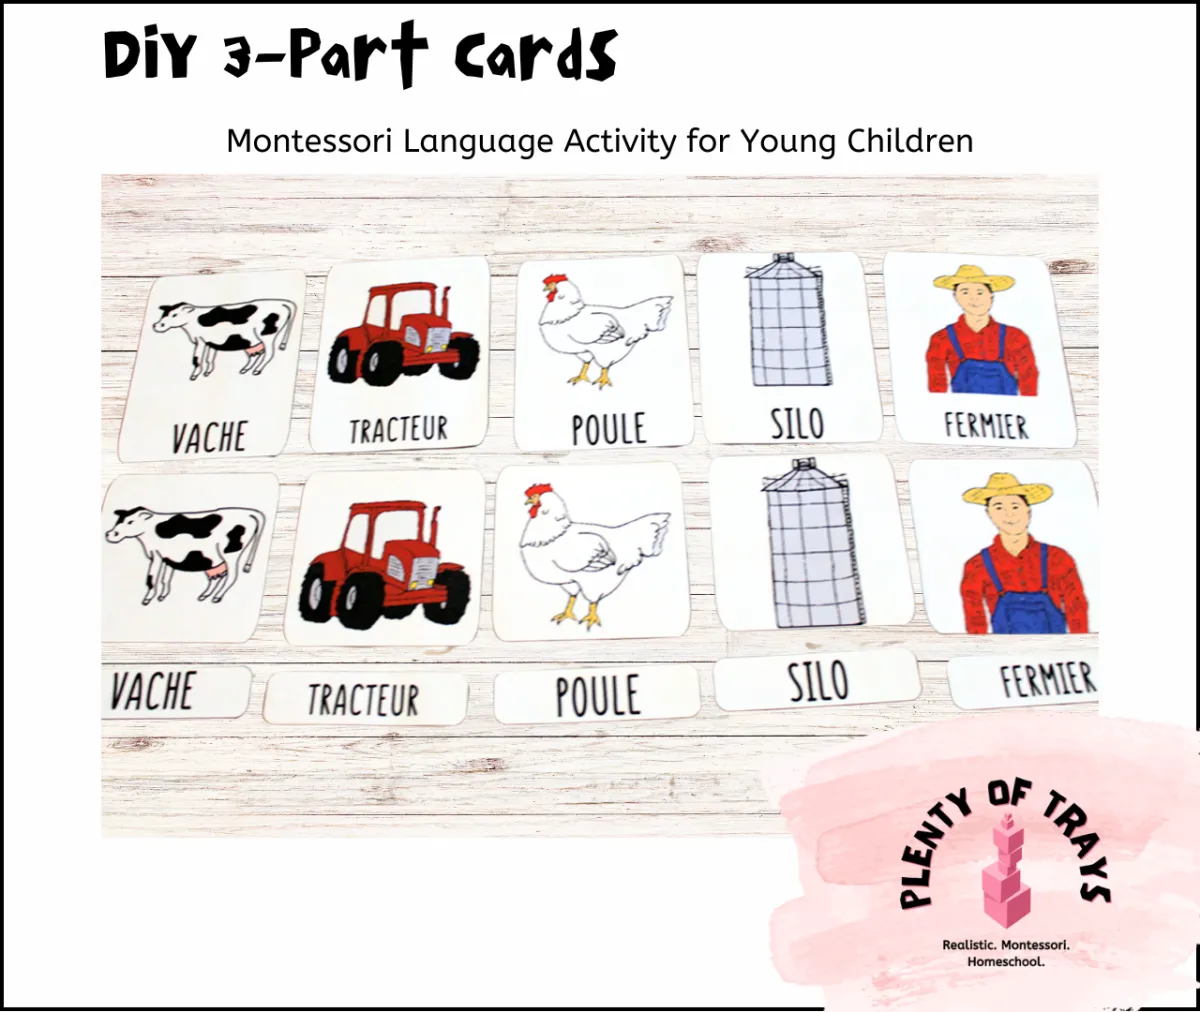
3-part cards are used in Montessori classes and homes everywhere. A quick Google search will give you tons of ideas and tutorials on how to make and use 3-part cards. They are an amazing tool for building vocabulary, matching skills, and early reading
Believe it or not, these cards have 3 parts; a picture card, a word card, and the error control card which has both the picture and the word. The Montessori Method encourages the child to learn independently and these cards help them do just that. As they start learning how to read, they will read the word, then place it with the appropriate picture. They can use the error control card to see if they are correct.
But did you know they can be used for so much more than simple matching? If you’ve ever found yourself wondering, "How else can I make these more engaging?", you’re in the right place!
At the bottom of this post, I’ll share 10 fun and even unexpected ways to use 3-part cards at home—some will get your child moving, others will spark creativity, and a few might just surprise you. Let’s dive in and make learning even more exciting!
But first, let’s make Montessori 3-part cards!
Paper: I use regular paper, but cardstock works too
Printer
Scissors
Optional: Laminator and sheets: I have been really happy with this laminator.
Find your 3 part cards, The Montessori Print Shop has a nice selection. Or check out Little Spark Company’s 3 part cards. (Use coupon PLENTYOFTRAYS for a discount!). If you’d rather buy pre-made cards, take a look at these.
If you’re ever looking for a set and can’t find it, send me a message and I will create them for you!
Print and cut them out.
Now is the part that you have a few options. If you are planning on making tons of different sets of cards then you might want to code them so that if they do get mixed up, you can easily sort them. To code them, you can either write a number or use a colored dot on the back of each card (eg: your wild animal set will have the #1 or a yellow dot, your transportation set will have #2 or a blue dot, etc.). Another option is to glue the cards on colored paper before laminating. This makes it really obvious which set it belongs to and adds a nice border to each card. Laminating will extend the life of the cards but for home use, you can get away with just cardstock.
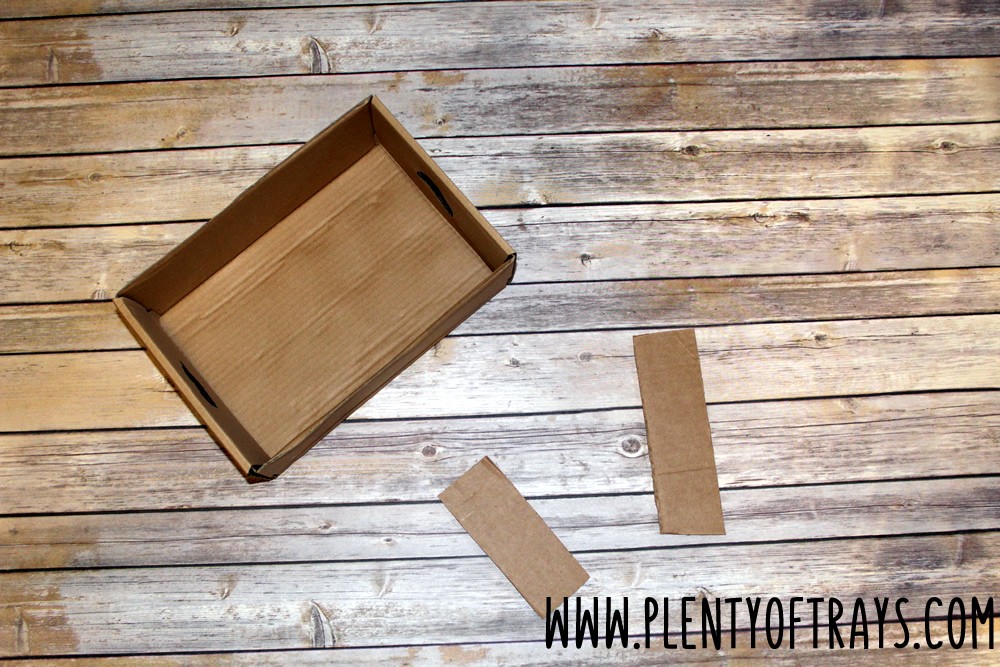
Also, it’s not totally necessary but having a tray with 3 separate compartments is really nice for keeping the cards organized. I made one with cardboard then I found a tray at the thrift store! As you can see in the pictures, I had a short box and hot glued 2 pieces of cardboard inside to make the openings.
You can buy a tray from Montessori Services or check out the options on Etsy.

Presentation
This presentation is for the very basic 3 part cards use. Depending on how many cards and the size of the table, you may need to use a work rug instead. If your child is very young, it is recommended that you start with matching an object to the card first. This video explains the presentation is very well done.
Carry the tray to a table or rug.
Take the first control card (card with picture and word) and place it on the top left side, saying 'This is ...'
Take the second control card and place it on the right of the first one, saying 'This is ...'
Keep going until you have placed and named all of your cards.
Then take one of the picture cards and starting at the left, move it from control card to control card until you find its pair.
Place it underneath.
Repeat step 5 and 6 until you matched all the pictures.
Proceed with the name cards. Depending if your child can read or not, you can read it out loud then going from left to right find the match.
Place it underneath.
Once the cards have all been matched together, take a moment to admire your work.
One by one, pick up the name cards and place them back on the tray.
Do the same for the picture cards and the control cards.
Bring the tray back to the shelf.
Variation
Here are 10 more ways to use 3-part cards, adjust according to your child’s abilities:
1. Scavenger Hunt
Hide the picture cards around the house and give your child the word labels to match as they find them! This adds movement and excitement to learning.
2. Mystery Bag
Place a few picture cards in a bag. Your child draws one, guesses what it is, and then finds the matching label!
3. Sensory Bin Match-Up
Bury small picture cards (or use objects that match the pictures) in a sensory bin (rice, sand, or shredded paper). Have your child dig them out and match them to their control cards.
4. Shadow Matching
Place the picture cards on a light table or window, place another paper on top and have your child trace the outlines on the sheet of paper. Or you trace them ahead of time. Then, match the outlines/shadows to the cards! (The picture card for pre-reading children, the word card for reading children)
5. Playdough Stamping Fun
Use picture cards as inspiration for making playdough impressions, sculptures, or drawings! Afterward, match them with the word labels.
6. DIY “What’s Missing?” Game
Lay out a complete set, then secretly remove one picture card while your child closes their eyes. Can they guess what’s missing?
7. Hop & Match
Tape word labels to the floor and hand your child the picture cards. They have to jump to the right word while placing the correct picture on it!
8. Storytelling Challenge
Pick 3-5 random picture cards and have your child create a short story using those items or animals as characters!
9. Fridge Matching (With Magnets!)
Attach small magnets to the back of each card and let your child match picture cards and labels on the fridge or a magnetic board.
10. Water Painting Reveal
Write the word labels in white crayon on watercolor paper. Have your child match the picture cards and then paint over the word to reveal it magically!

Hear What Others Have to Say
Sarah

My 6 year old made us dinner all by herself last night with the meatball recipe and made a salad to go with it! It was amazing!
I almost didn't know what to do with myself not having to cook or help her. Thank you so much!
Chelsea

I just read your guide, it was really awesome! I am grateful for the 29 Montessori definitions to help me better understand some of the things I've heard at my daughter's school but never knew what is was. I can't wait to try your recipe with my girls and for your course to come out.
Thank you again!
Kellie

We don’t do Montessori (except in the atrium) but love following your page. I also ended up finally getting a kids knife set from Amazon and a small jug for pouring milk based on your recommendation ;) Am considering reorganizing my kitchen so kiddos can unload the dishwasher - they already help with cutlery and plastic items.
Will continue to watch your page and stories for inspiration!
Sasir

I am your subscriber from another country. Being a Montessori teacher of English for 3 year old kids i find your materials very useful. Thank you.

© 2025 Plenty of Trays - All Rights Reserved
