Read Our Latest Blogs
Simple DIYs, how to prepare your environment, product features, and so much more!

Montessori DIY Touch Boards
Disclosure: This post may contain affiliate links.
Montessori DIY Touch Boards
Also known as tactile boards, they were created by Dr. Maria Montessori to help the children in her care to develop their sense of touch or tactile sense. She provided them with these simple touch boards and taught them how to touch them ever so lightly. She also encourages the use of a blindfold, so that only one sense is used at a time. In chapter 13 of her book, The Montessori Method, she writes about how the children really enjoy discovering new surfaces and feelings.
They enjoy keenly touching any soft pleasant surface, and become exceedingly keen in discriminating between the differences in the sandpaper cards.
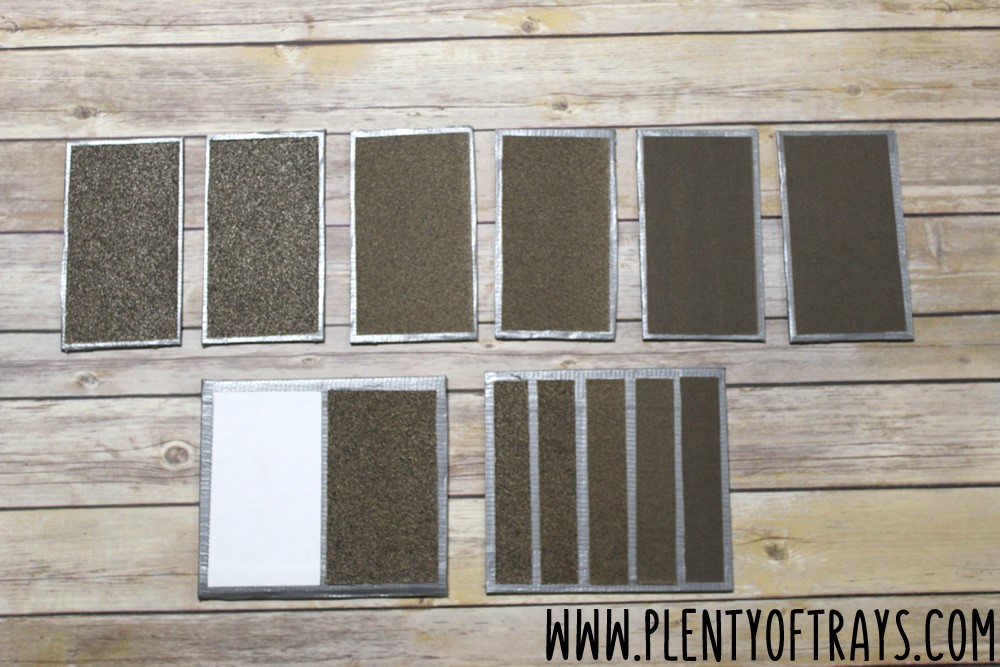
She talks about different designs for the tactile boards; the first is a polished board with one half covered in sandpaper. This is the first one to present to your child. It teaches them, of course, the concept of smooth and rough. Second is another smooth board with strips of sandpaper to reinforce the concepts of smooth and rough. Third is a board with the gradation of smooth to rough with several strips of sandpaper. This one really helps the child to be aware of different grits. It can also be used to introduce the idea of 'rougher and smoother' or 'roughest and smoothest'.
She also refers to other paper slips with different grits of sandpaper. These ones are used as a matching work.
The classic Tactile Boards are made from wood but I wanted to find a quicker, cheaper alternative.
You will need:
Sandpaper - oddly enough, we had received a package of sandpaper as a Secret Santa gift exchange Christmas game a few years ago and I had wanted to get rid of it but thankfully my husband had convinced me otherwise. I would have never thought I'd be using it to develop my children's tactile sense! If you have not been fortunate enough to have received sandpaper as a gift, check out your local dollar store, hardware store, or buy some online.
Paper - Although duct tape is smooth, I decided to add a piece of paper to make it obvious to the child where the smooth is and the rough is.
Board game - At first, I planned on using cardboard, but I wasn't convinced it would be sturdy enough. I decided to try with a board from a game that was missing pieces and I am very please with the results. Plus, you can get games at garage sales for very cheap. If you have thick cardboard lying around feel free to use that. I didn’t know until now but you can get some nice small pieces of plywood on Amazon and I’m thinking you could use them for so many DIYs!
Duct tape - I used it to hide the pictures on the game board. If you are using wood or cardboard, however, you wouldn't need it. You can grab this fun colored pack and it would be fun for crafts and other DIYs.
Glue - I grabbed the closest glue that I had, which was simple a glue stick. I was skeptical, but I put the boards under some weights overnight and they stuck!
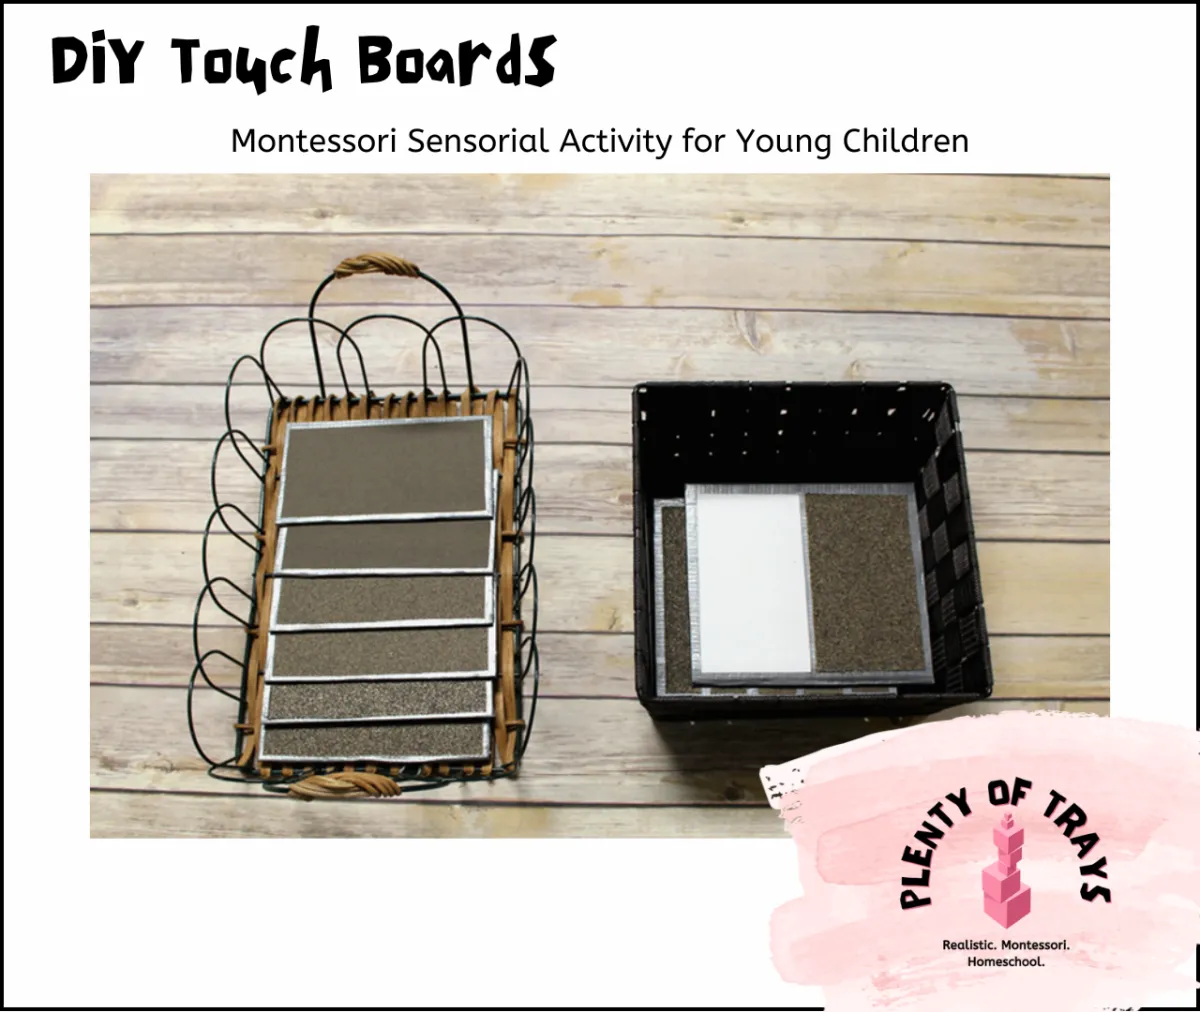
First, decide which boards you'd like to make. I chose to start with the first board, the third board, and smaller boards for the kids to match. Then cut out smaller boards from your boardgame or cardboard and cover them with duct tape. Cut out the appropriate amount and types of sandpaper and glue them on. The edges of my sandpaper were rolling up a bit so I placed them under a large pile of heavy books to dry overnight.
I placed the first and third boards on a tray and the matching boards on a different tray.

Presentation
Here is the presentation for all 4 types of boards. Start with board #1 and then follow your child's lead and interest to see if you should present more. Before presenting a touching work, it is recommended that you sensitize your fingers. This just means washing your hands with warm water.
Board #1: Half Smooth, Half Rough
Bring the tray to the table.
Take out board #1 and hold it in place with your left hand.
Start on the top and gently go all the way down the rough side with your index and middle finger.
Do the same on the smooth side.
Go back to the rough side and stroke it again while saying the word 'rough'.
Do the same on the smooth side saying 'smooth'.
Allow your child to do the same.
Board #2: Alternating Strips of Smooth and Rough
Bring the tray to the table.
Take out board #2 and hold it in place with your left hand.
Start at the top of the first strip on the left and gently go all the way down with your index and middle finger.
Go to the next strip and do the same.
Repeat step 4 until you have touched all the strips.
Go back to the first strip and say the appropriate word while stroking.
Following the same order, touch and name all of the strips.
Allow your child to do the same.
Board #3: Smoothest to Roughest
Bring the tray to the table.
Take out board #3 and hold it in place with your left hand.
Start at the top of the first strip on the left and gently go all the way down with your index and middle finger.
Go to the next strip and do the same.
Repeat step 4 until you have touched all the strips.
Allow your child to do the same.
Board #4: Matching Boards (also called Touch Tablets)
Bring the tray to the table.
Place the tablets in front of you in random order.
Touch the tablet that is farthest to the left.
Tell the child you will find the match using only your sense of touch (you can close your eyes, look away or use a blindfold), then touch the tablets until you find the match.
Place the pair to the side.
Repeat steps 3, 4, and 5 until all the pairs have been made.
Return tablets to the tray.
Board #4: Grading Boards (another use for the Touch Tablets)
Bring the tray to the table.
Place the tablets in random order in front of you.
Tell the child you will find the roughest one using your sense of touch. You can use a blindfold, close your eyes, or simply look away.
Going from left to right, touch all the tablets then bring the roughest one to the left.
Proceed by finding the next roughest in the same way.
Repeat until they have all been put in order.
Touch all the tablets in order to make sure you were right.
Put the tablets back on the tray.
and as always, stand up, push your chair back to the table, and return the tray to the shelf.
Variation
To make easier: Use only the coarsest and finest boards for the matching and gradation works.
To make harder: Make more Touch Tablets. Use blindfold.
To make more fun: go outside (or around the house) and try to find things that are smooth and rough.
Buy It Instead
Here’s one from Adena Montessori on Amazon.
A different set from IFIT Montessori.

Hear What Others Have to Say
Sarah

My 6 year old made us dinner all by herself last night with the meatball recipe and made a salad to go with it! It was amazing!
I almost didn't know what to do with myself not having to cook or help her. Thank you so much!
Chelsea

I just read your guide, it was really awesome! I am grateful for the 29 Montessori definitions to help me better understand some of the things I've heard at my daughter's school but never knew what is was. I can't wait to try your recipe with my girls and for your course to come out.
Thank you again!
Kellie

We don’t do Montessori (except in the atrium) but love following your page. I also ended up finally getting a kids knife set from Amazon and a small jug for pouring milk based on your recommendation ;) Am considering reorganizing my kitchen so kiddos can unload the dishwasher - they already help with cutlery and plastic items.
Will continue to watch your page and stories for inspiration!
Sasir

I am your subscriber from another country. Being a Montessori teacher of English for 3 year old kids i find your materials very useful. Thank you.

© 2025 Plenty of Trays - All Rights Reserved
